Deborah Kline, Ed.S.

Because math seems to be the subject I get the most “Help!” emails about, this post shares some practice-proven math tools.
Full disclaimer, math is not my subject. I am very much a right-brain – creative, artsy, let-my-imagination-guide-my-learning type student and teacher. Because of the rules and austerity of math, it used to be my least favorite subject; however, finding and creating the right tools has made math much more enjoyable – building confidence, and reigniting interest.
There so many wonderful tools out there. This is by no means an exhaustive list. If these don’t quite fill your student(s) needs, reach out to me or a math teacher and we can create a tool which helps your child! Here are some:
TOUCH POINTS
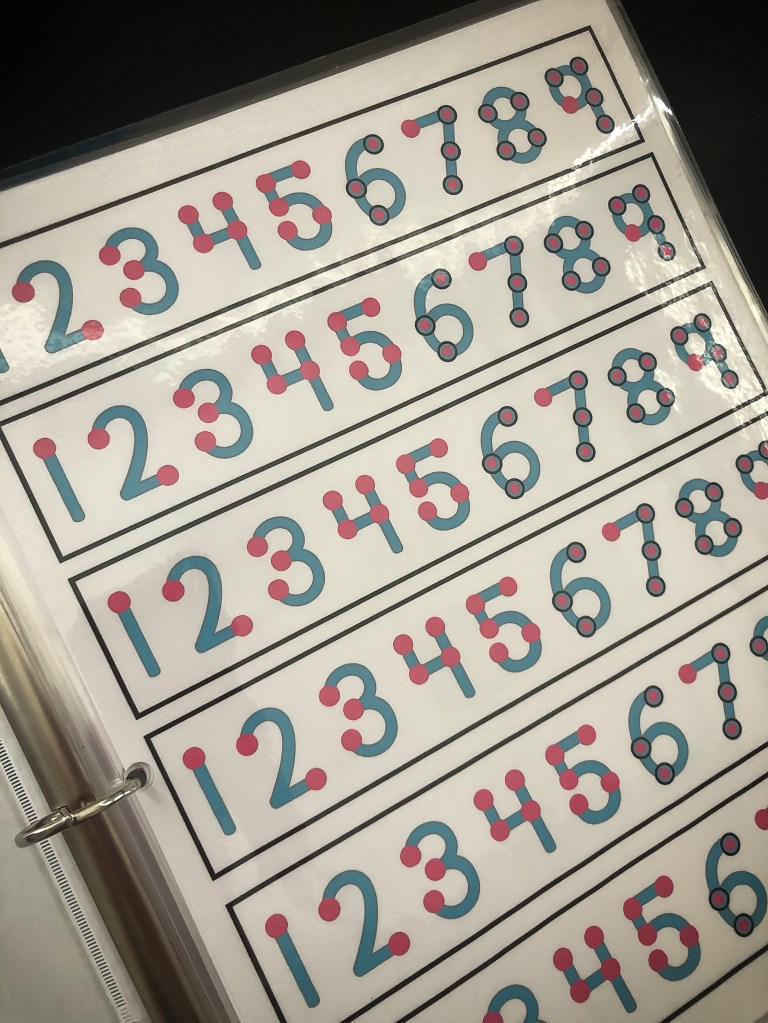
My daughter’s ABA therapist introduced us to touch point math when she was in Kindergarten. Touch Points teach children number sense by using points on the number itself as a visual/tactile reminder for learners who struggle to memorize how many counts each number gets. See the picture for the points.
The single dots get 1 touch, the double dots get 2. I created the sheet with multiple lines for addition, but a single line for reference is sufficient.
Touch Points can be used in multiplication as the child touches each dot the number of times you by which you are multiplying.
There are also Touch Points for money.
You can find a wide variety of touch point math activities and resources on www.TeachersPayTeachers.com
https://www.teacherspayteachers.com/Product/Touch-Point-Math-Numbers-and-Coins-Student-Desk-Reference-3259622
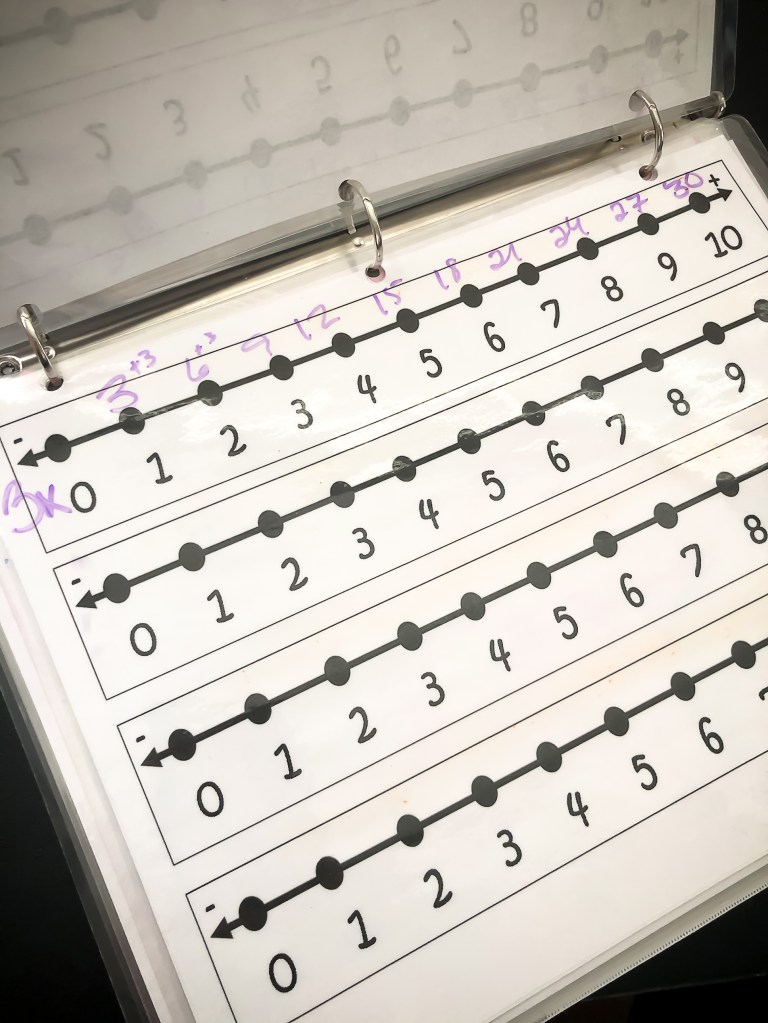
NUMBER LINES
Plain, simple number lines can be an incredibly useful tool as students are building number sense. A number line is a great tool because the child can be trained to write a number line on any scrap paper to be able to retrieve the skill process.

Using a Number Line for Rounding
Number lines can also be used for rounding. Have the student copy the number on the left side. Have them put the number in the tens place in front of the 0 on the line making it the lower number. Then count up 10 to the next number.
We draw a line between 4 and 5 then recite a tool my kids’ 3rd grade math teacher taught us: “Five or more, let it soar. Four or less let it rest.”
Have the child plot the original number on the number line then visually see which tens place it is closest to, explaining rounding is connecting the number to the closest tens.

Number Lines for Multiplication
When I was a student, we used multiplication tables and speed drills. Well, while that worked for me, that approach bombed with my special learner. It was too much memorization.
Using skip counting (for example: 5+5=10, 10+5=15, 15+5 =20, 20+5=25, etc.), we use our number lines to practice each multiplication family. We do this almost daily for weeks before any other math work. The repetition promotes memory – and the more memory challenges a student has, the more repetition will be needed.
Again, the laminated sheets allowed for the practice and scaffolding, removing numbers already learned, focusing on the facts still missing.
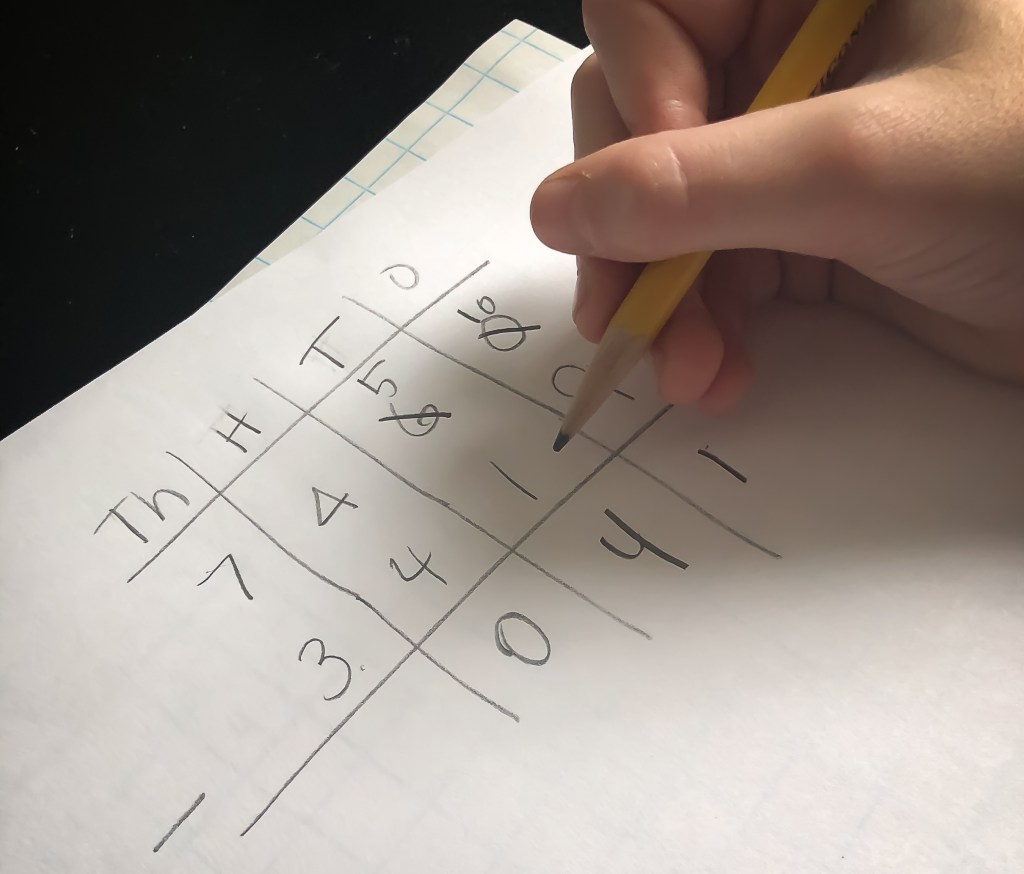
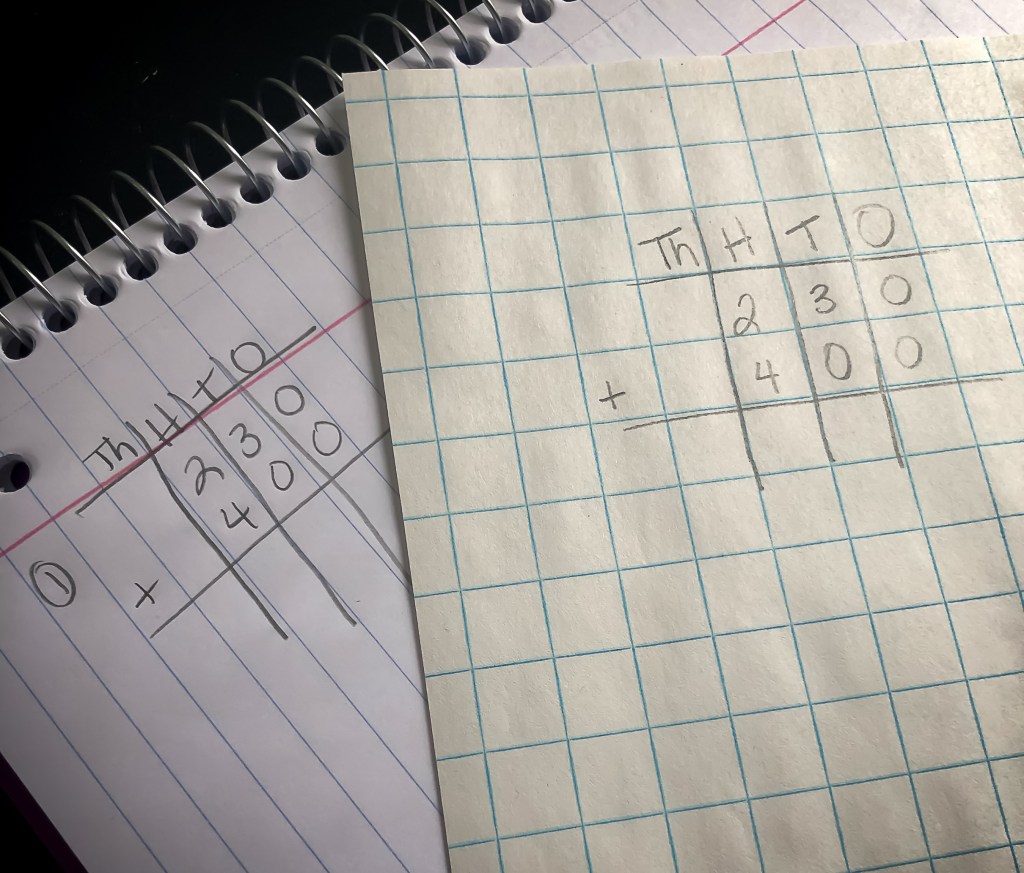
Th/H/T/O CHARTS
Many students struggle with understanding number values. Using Th/H/T/O charts greatly increase awareness for why each column needs a number – even if it is a 0. The lines also break apart numbers to help with the confusion.
PAPER TRICKS
Graph Paper and Turning the Paper Sideways
I know many teachers and parents who use large size graph paper or have students turn the paper sideways to help students line their numbers up correctly. This helps many students; however, students with dysgraphia may still struggle because they need to write larger than what the room allowed on the pre-lined papers. For these students, provide much larger blocks of open space for writing numbers.
SUBTRACTION MANTRA: “Put the lower number in your brain, then count up”
It took us 2 years of painstaking practice for my daughter to finally master subtraction. I don’t know if it was from gaps from her public school teachers having to move forward before she understood the concept, or she simply never got the foundation, or if she just needed more practice – but subtraction was our big hold up.
We tried counting backwards on number lines – which makes logical sense to me as an adult – but to this day, my daughter cannot figure it out. Going forwards then backwards confused her little brain.
Until we started rearranging the math problem so that she could count forwards.
For example, 18-7.
I tell her to start with the low number then count up to the higher one to find her answer.
My son’s wonderful 1st grade teacher actually told us to tell the child “Put the low number in your brain (have the child tap his/her brain to remember the number), then count up using your fingers. However many fingers you’re holding up is the answer.”
TAB COVERINGS
This is a newer, but quite simple, tool I have created. I noticed with the bigger, multiple digit problems, her brain was quickly overwhelmed by the number of numbers on the page. I started using my finger to cover the lines but that was annoying. Then I thought of post-it tabs! Layered to reduce visibility, we use the tabs to help her focus on just one number at a time. Eventually we remove the tab and use the finger to cover – and within a few weeks, the child does not need the covering at all.

Highlighting and Color Coding
This one is new to me for using with math, but is something we use frequently in other subjects: highlighting and color coding! In math, highlight operation symbols to help students remember to check the operation being asked to use.
WHITE BOARDS/ SHEET PROTECTORS/ LAMINATION
As mentioned in part 1, white boards, laminated sheets, or sheet protectors are a wonderful tool for helping learners practice math skills without the consequential impact of pencil on paper and erasing.
The word of caution when using white boards for practice: monitor how many tasks are being asked. If too many skills such as copying and lining numbers up are required, the child could easily make unnecessary, careless mistakes in the transfer. Tools are designed to help the learner, not complicate the learning process. An alternative would be to use an unmelted lamination sheet or sheet protector to cover over the workbook or work sheet as the child works out the problem on the lamination.

ADEQUATE WORK SPACE
Choose or create worksheets which allow plenty of room for writing out mathwork. We encountered so many frustrating incidents because teachers used work sheets which gave barely an inch square to work out math problems. Both of my children with dysgraphia could not keep their numbers in the tiny squares; thus, they would have to copy problems to other papers – often resulting in needless errors.
These are just a few of the tools we use on a regular basis. They are by no means the exhaustive list. If you have a tool you have found useful, please comment and share below. We are a learning community!
If you need assistance creating tools for your child’s learning, reach out to me and we can create a plan for strengthening your instruction and enhancing the learning process, ensuring your student’s learning is successful! You can reach me at DeborahKlineConsulting@gmail.com
This is part 2 of a 3 part series. Stay tuned for part 3 where we delve into study skills and learning tools for English and Language Arts.
